Xcode Update Guide (macOS build agents)
This document describes how we track, download, install, snapshot, test, and publish new Xcode versions for our macOS build-agent VMs.
1) Track new Xcode releases
Before starting an update, confirm the new version and its details:
- Check releases on xcodereleases.com (release history, build numbers, links): https://xcodereleases.com/
Tip: RSS → Slack notifications
xcodereleases.com provides RSS feeds. You can connect the RSS feed to a Slack channel so the team is notified when a new Xcode version is released.
2) Read release notes first (mandatory)
Always review Apple’s Xcode release notes for the target version.
Focus especially on:
- Known Issues
- Simulator changes (new runtimes, missing runtimes, download issues)
- Toolchain changes (build system, signing, device support)
- Anything related to driver updates or simulator runtimes
This step prevents surprises later (e.g., “simulator runtime must be downloaded manually”, “known crash on first launch”, etc.).
3) Decide which Xcode versions should exist in the guest VMs
Even if the host has enough disk, guest VMs have limited storage, so we do not install every Xcode into a single VM.
Storage guidance for builds
When multiple Xcodes are installed, builds require additional temporary space. Keep free space available in each guest VM:
- Minimum free space: 50 GB
- Recommended free space: 80–100 GB
Version selection strategy (keep “bridge” versions)
We keep a curated set of Xcode versions so customers can move between versions without us storing every patch build everywhere.
A practical approach:
- Keep the latest patch of a version line (e.g., latest
X.Y.*) - Keep the first (or early) patch of the next version line as a bridge
Example (illustrative):
Xcode 16.0.latest→Xcode 16.1.0Xcode 16.1.latest→Xcode 16.2.0
This provides upgrade paths while keeping VM disk usage under control.
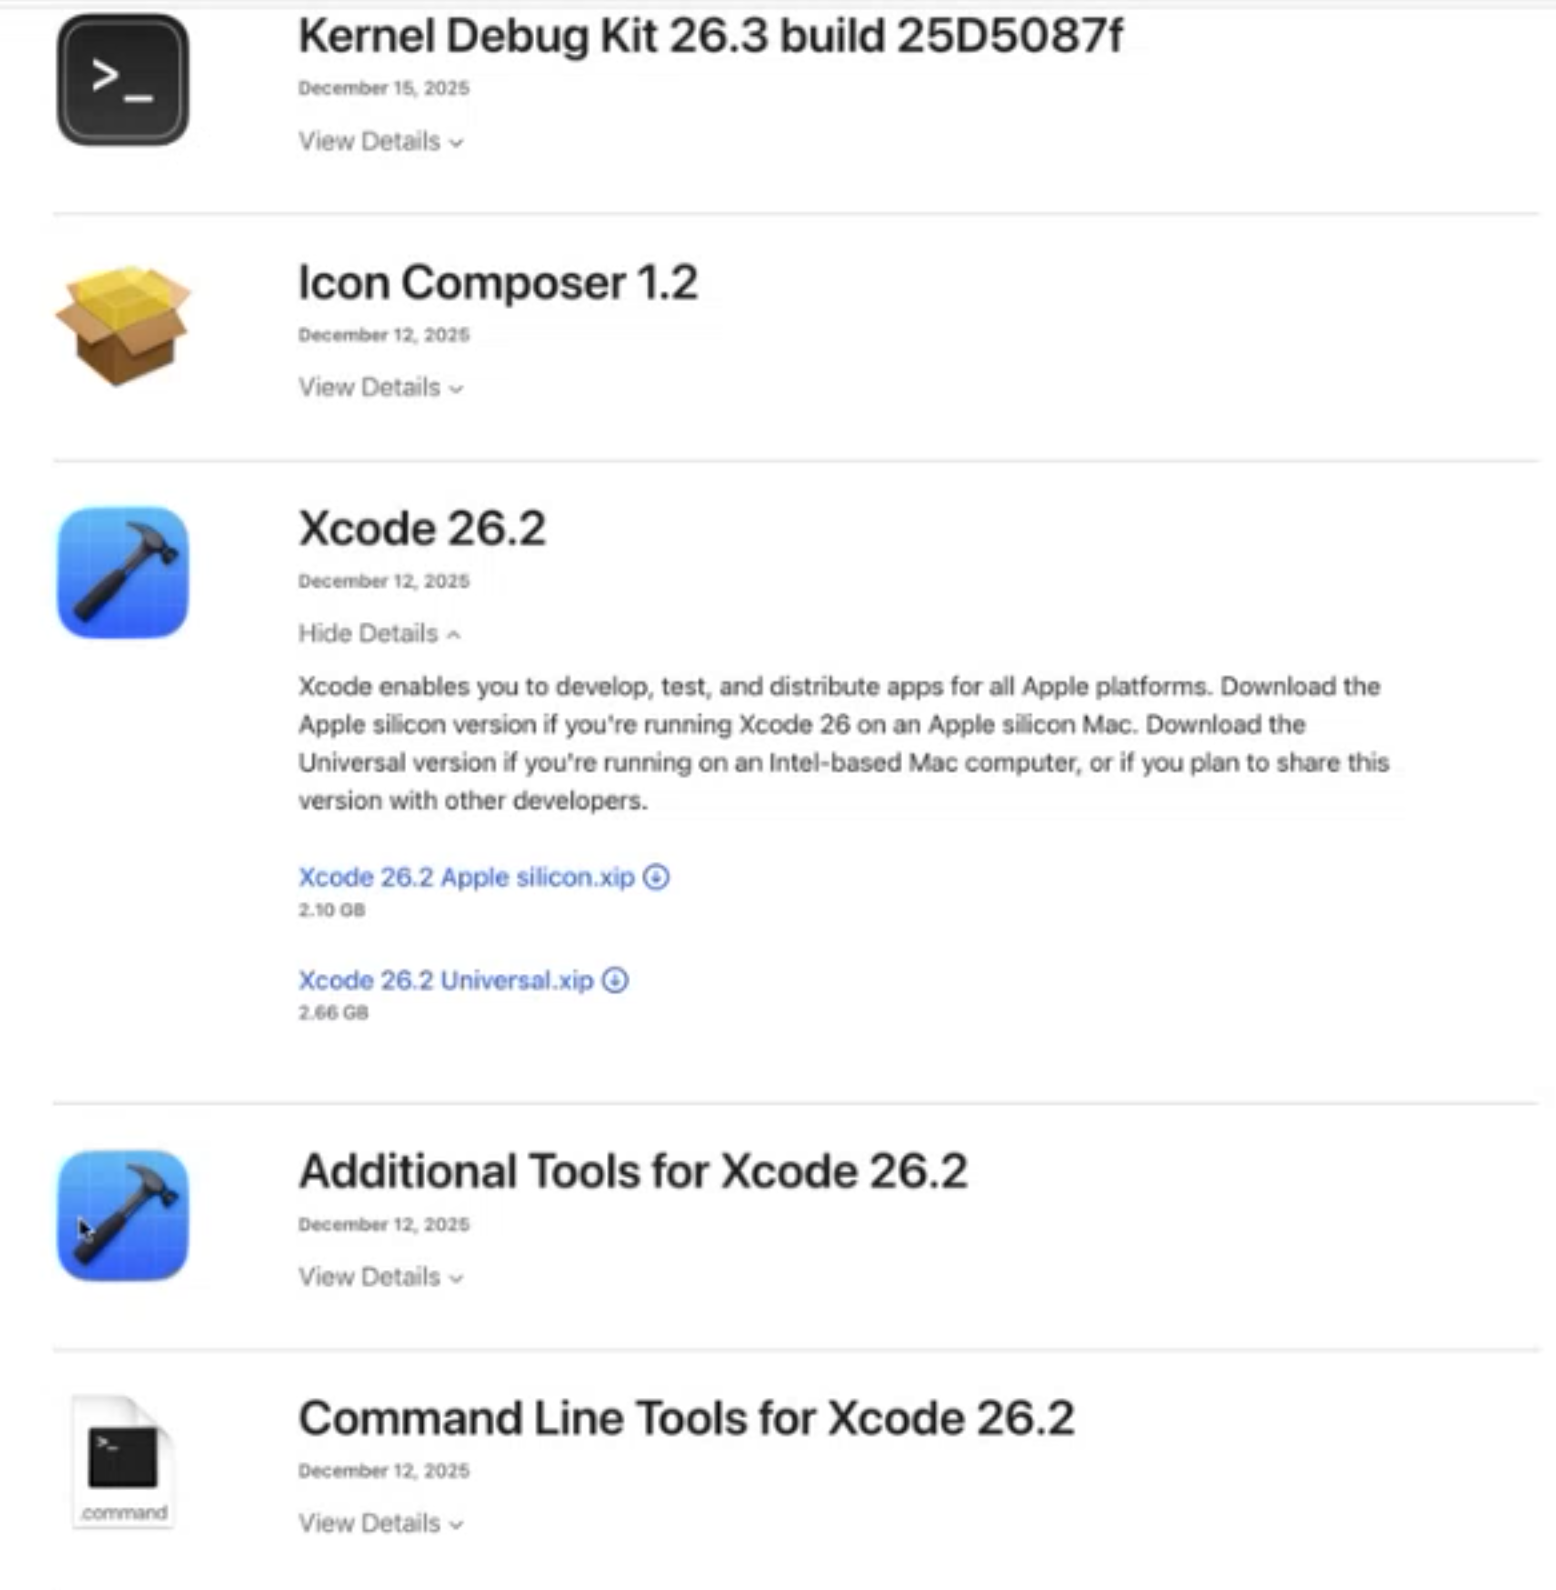
4) Download the Xcode release (.xip)
You can download Xcode via:
- Apple’s official download page (manual)
- An open-source CLI (e.g.,
xcode-install) that can download directly
For Apple Silicon hosts, the Apple Silicon / arm64 Xcode build is sufficient.
5) Convert and upload Xcode into the bucket
After the .xip is downloaded:
-
Use the script to convert and prepare Xcode artifacts:
-
ac-script-agent/m1/xcode-upload.sh -
The script converts the Xcode into a DMG-based artifact and uploads it to:
-
appcircle-dev-buildagent-files/m1/images(bucket)
Keep naming/versioning consistent. The rest of the pipeline assumes predictable naming.
6) Create a new Xcode “layer” via Tart snapshots
We use macOS virtualization snapshots as “layers”. New Xcode versions are added by creating a new snapshot from an existing “latest” snapshot.
6.1 Find the latest snapshot
Use:
tart list
Identify the most recent snapshot that should be the base for the new Xcode layer.
6.2 Apple macOS virtualization limit (important)
Due to the macOS Software License Agreement, we run at most 2 macOS VMs concurrently on the host.
If you need a 3rd VM during snapshot work:
- Shut down one VM first
- Then create/start the next instance
6.3 Clone the base snapshot to create a working VM
Use:
tart clone <base-snapshot> <new-working-vm>
6.4 Snapshot provisioning scripts
Under the following folder, we keep guest-side scripts used during the snapshot setup:
ac-script-agent/osx/scripts/tart-vm/sequoia/
General flow:
- Start the VM via the automation scripts
- Attach/copy the required DMG(s) into the guest
- Configure the guest and install Xcode
6.5 Copy DMGs inside the VM (disk usage / reliability)
To avoid unexpected APFS-related disk behavior and to ensure stable access from inside the guest, DMG files are copied inside the VM using:
cp -R
6.6 Cooldown phase (do not skip)
A “cooldown” phase was added to the scripts.
Why:
- When the VM boots, Simulator runtimes and SDKs can be attached as disk images.
- We need the VM to be fully “settled” so the newly installed Xcode correctly sees existing components.
What to check:
-
Simulator volumes mounted under paths like:
-
/Library/Developer/CoreSimulator/Volumes/watchOS_... -
Verify with:
-
df -h
If these mounts are missing, Xcode may behave inconsistently during install/first launch.
6.7 UI steps during installation (VNC)
Some installation steps require UI interaction. Connect via VNC.
Typical actions:
- Launch Xcode once
- Trigger simulator runtime downloads (if required by the release)
- Confirm simulator download progress
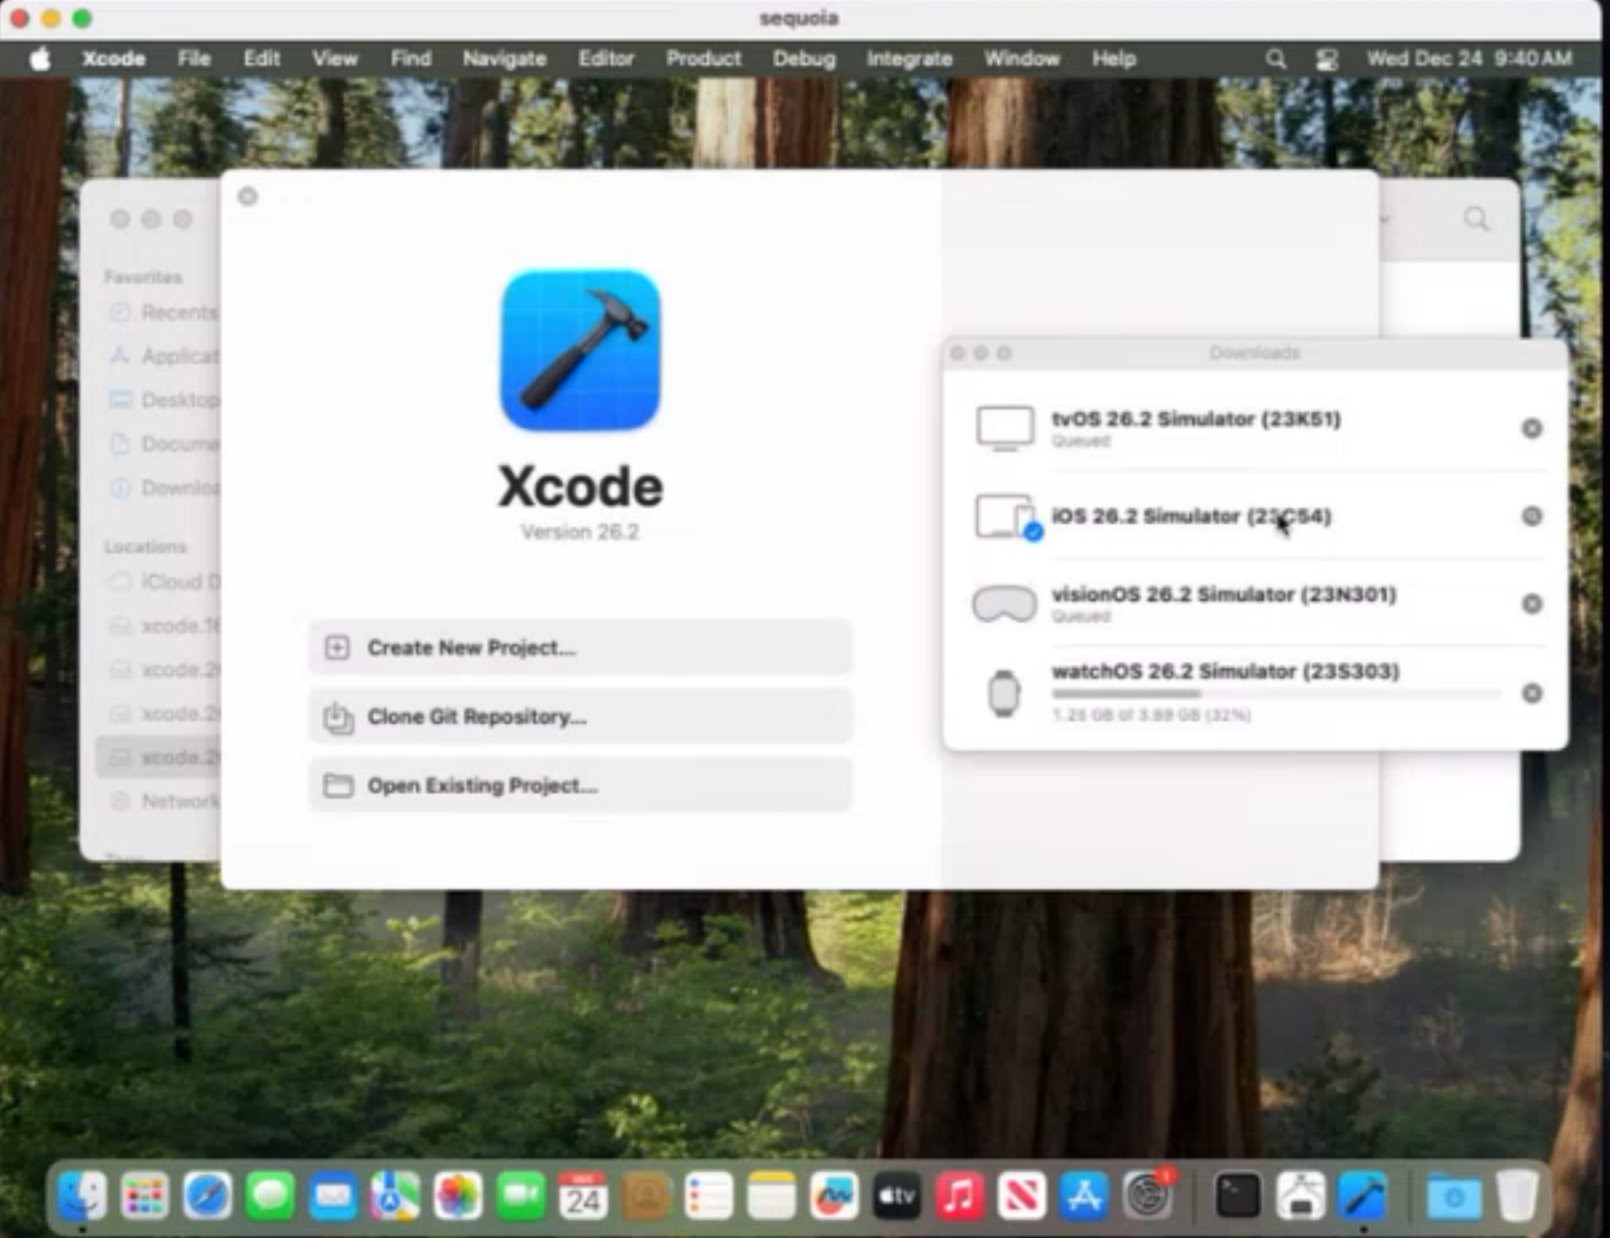
After simulator/runtime downloads complete:
- Run/verify the cooldown checks again (
df -h, mounted volumes)
6.8 Finalize snapshot
After installation and checks:
-
Verify the new snapshot exists / VM state looks correct:
-
tart list -
Clone/version the snapshot according to Xcode version:
-
tart clone <working-vm> <xcode-versioned-snapshot>
7) Smoke tests (required)
Bring up a VM from the new snapshot and validate end-to-end.
7.0 Ensure the tested Xcode is the latest stable release
In some cases, a beta Xcode may still exist in the dev environment and can be used for testing. However, Apple may publish an official stable release and later stop accepting submissions built with the beta toolchain. This can mislead test teams.
For this reason, always verify that the Xcode used in smoke tests is the latest stable release, even after an Xcode update has been completed.
Practical checks:
- Confirm the version on xcodereleases.com
- Confirm in the VM via
xcodebuild -version
7.1 Runner configuration inside the VM
Configure:
- API endpoints the runner connects to
- Redis endpoints used for build-log streaming
- Access token (obtained from UI)
7.2 Parallel smoke test VMs
We typically create two test VMs:
tart clonethe tested snapshot twice- Start them using
screenso they remain running reliably
7.3 Test scope
- Android smoke test
- iOS smoke test
8) Approval + publish
After smoke tests:
- CSM team completes verification and gives approval
8.1 Publish new macOS VM image to the bucket
Publishing is done via:
ac-script-agent/m1/create-and-upload-image.sh
Notes:
- The script compresses the VM image, but the resulting artifact can still exceed 100 GB.
- Before starting, verify available disk space on the host (both for the source VM and the temporary output).
Example command:
./create-and-upload-image.sh \
  -e dev \
  -i $HOME/.tart/vms/sequoia \
  -n sequoia \
  -o $(pwd)/images/ \
  -c $(pwd)/cred.json
8.2 Update iOS infrastructure documentation (public docs)
Documentation updates are made in the appcircle-docusaurus project and delivered via a Pull Request.
Where to update:
docs/infrastructure/ios-build-infrastructure.mdThis is published to: https://docs.appcircle.io/infrastructure/ios-build-infrastructure
What to update:
- Add the new version under Available Xcode Versions
- When an Xcode patch arrives, we typically replace the latest patch within the same minor line (iOS stack follows this approach)
Also update:
- Runner image references on the Runner VM Setup page: https://docs.appcircle.io/self-hosted-appcircle/self-hosted-runner/runner-vm-setup#download-the-macos-vm-image-manually
8.3 Add the new Xcode version to system option lists
The Xcode versions are used in multiple services and must be updated accordingly.
Build Server
In the ac-server-build project, update:
.../Appcircle.BuildServer.Domain/BuildContext/BuildSettingAggregate/ObjectiveSwiftSetting.cs
Add the new version to:
XCODE_VERSION_GROUPSXCODE_VERSIONS
Publish Server
In the appcircle-publishflow-components project:
- Update the relevant component YAML(s) to include the new option
- This change typically requires modifications across multiple files (often ~10 files)
Important note: version list is hard-coded
The Xcode version list is currently not generated dynamically. When adding/removing versions, you must update the hard-coded option list accordingly.
Appendix: Key paths & commands
URLs
Scripts / locations
ac-script-agent/m1/xcode-upload.shac-script-agent/m1/create-and-upload-image.shac-script-agent/osx/scripts/tart-vm/sequoia/- Bucket:
appcircle-dev-buildagent-files/m1/images
Commands
tart listtart clone ...df -hxcodebuild -version